For any operation with a walk-in refrigerator, it is important to maintain its proper functioning. A vital part of the cooler is its thermostat which guarantees that food and liquids remain at the required temperature. A malfunctioning walk-in cooler thermostat can lead to spoilage, hence resulting in losses for your business.
For those with the necessary knowledge, swapping out a walk-in cooler thermostat is nothing tricky. Whether you’re an experienced handyman or just wanting to avoid spending money on contracting it done, this guide has got all the info you need for a successful installation.
Step 1: Collect the Necessary Items:
Prepare yourself before you start by making sure all the necessary tools and supplies you’ll use to switch out your walk-in cooler thermostat are ready. Here’s a list of what you should have on hand:
– A flathead screwdriver
– An electrical voltmeter
– A new thermostat
– A wire connector
Step 2: Uncover the Former Thermostat
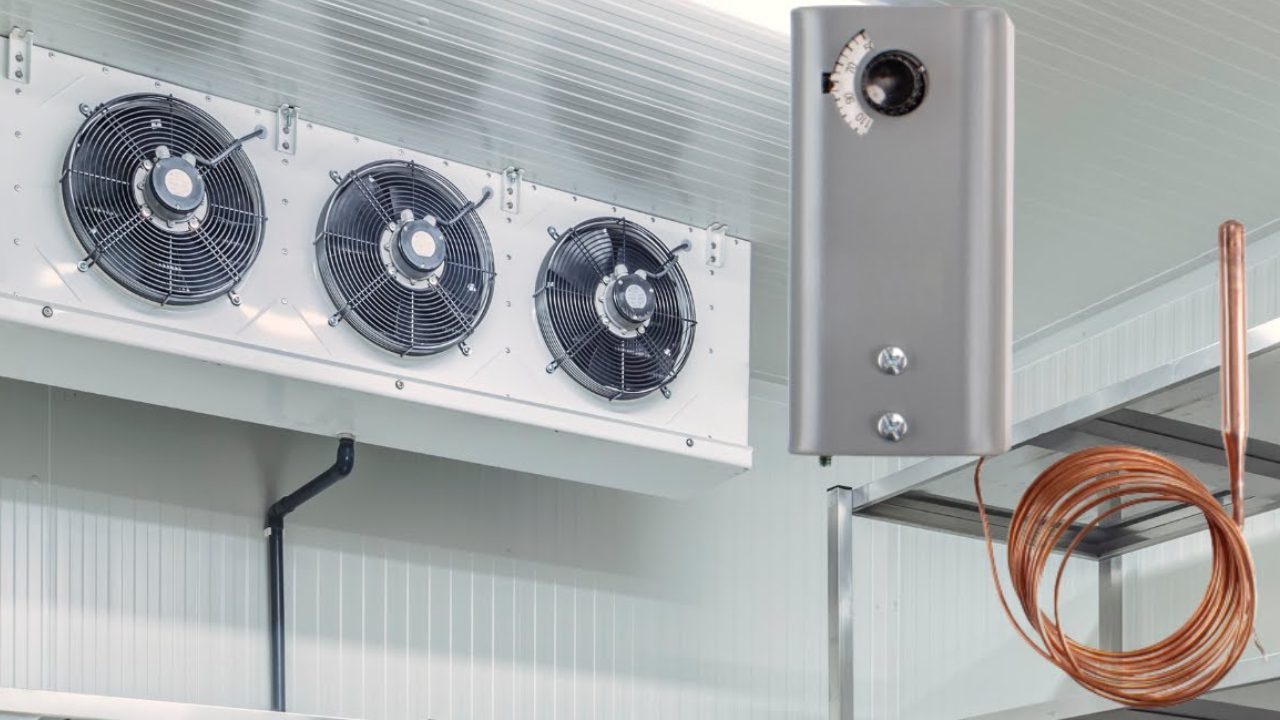
The initial move to interchange your walk-in cooler thermostat is to uncover the pre-existing one. Generally, the thermostat will be placed on the interior wall of the cooler. In case you are uncertain of its location, you can easily trace it by trailing the wires from the control box up to the thermostat.
Step 3: Shut off the Power Supply
Before tinkering with your walk-in cooler thermostat, it stands to reason to disconnect the power. Doing so will help prevent you from receiving an electric shock while working. To do this, locate the circuit breaker for your refrigerated area and switch it off.
Step 4: Take Out the Existing Thermostat
Once you have identified the current thermostat and detached its power source, get ready to take it out. All you need to do is uncrew it from the wall and separate the wires. Remember which wire came from where so that you can properly reconnect them when installing the brand new thermostat.
Step 5: Setting Up the Replacement Thermostat
The moment to install the updated thermostat has come. You may do this by joining the leads from the fresh unit with those from the fridge. Use a wire nut to make sure everything is firmly held together. After that, mount the new set up to the wall with screws.
Step 6: Inspect the Updated Thermostat
The time has come to ensure that your newly installed thermostat is up and running correctly. To do this, switch the power on to your chiller and adjust it to the desired temperature. Utilize a voltmeter and examine the voltage at the thermostat. If all checks out, then your updated thermostat is operating as expected.
Replacing a walk-in cooler thermostat doesn’t have to be tricky! With these 6 easy steps, you can do it with no trouble – and at no extra cost of bringing in a professional. The cooling system is a great place to start if you’d like to save some money and take the replacement into your own hands.
So what are you waiting for? Get ready with the necessary equipment and materials, and begin right away! Perseverance and thoughtfulness can help keep your refrigerator in excellent condition so that you can concentrate on other facets of your company. Your customers may even laud you for your diligence! All the best!
Ensure that your business is operating optimally with an effective walk-in cooler thermostat. Unity Cooling Systems are here to assist you with installation or maintenance – Contact us for a free assessment now and receive 10% off all repair services for the first time!
FAQs about Walk-in Cooler Thermostat :
What supplies do I need to switch out my walk-in cooler thermostat?
You’ll require a screwdriver, a voltmeter, the new thermostat, and a wire nut.
Where can I find the previous thermostat?
The old thermostat is typically mounted on the wall inside of the cooler. You can trace the wires from the control box to get there.
Is it okay for me to replace the thermostat?
Yes, as long as you turn off the power to your walk-in cooler before beginning, it is safe to replace this thermostat.
How can I disconnect the power?
To deactivate the electricity, just look for the circuit breaker responsible for your cooler and turn it off.
Can someone inexperienced still install their own thermostat?
Absolutely! Replacing a walk-in cooler thermostat is a simple process that anyone with basic know-how can complete.
How should I verify that my new thermostat works correctly?
To test if your replacement works correctly, simply turn on your walk-in cooler’s power again and set up it up to your desired temperature. Afterward, use a voltmeter to check its voltage at its location.
Do I require an expert service technician for this job?
No need for additional help! Replacing a walk-in cooler thermometer is an achievable task with some knowledge.
Is there any benefit in saving money by doing this repair myself?
Most certainly! By replacing it yourself you’ll save on costly labor fees.
Will substituting my current thermostat improve performance of my walk-in cooler?
Yes indeed! An effective thermometer is essential to obtaining optimal performance of your walk-in freezer; substitute it promptly if necessary in order to avoid any spoilage or other malfunctions!


